Do it yourself – How to make worn cabinets appear new
You may have reservations or doubts about taking on the task of repainting kitchen cabinets yourself, but you can do it. In fact, if you ready yourself properly you can complete the job with ease. In a project such as this, preparation can be everything. Take a look at our other article that goes more in depth about the prep work needed prior to painting your cabinets.
First, you’ll want to “size up” the job. Can the cabinets be repainted, or does their condition prohibit that? Determine immediately if they are plastic or plastic-coated. Laminates resist paint and the types that can be refinished require a special procedure with specific paints, but even then the results aren’t guaranteed. If you are dealing with laminated surfaces on your cabinets, contact a reputable paint dealer and test a sample of the paint on a hidden area to confirm that it works and adheres to the surface without issue. On the other hand, all wood, wood-laminate and metal cabinets can be repainted with ease.
 Flat front doors and drawers are also easily repainted. You’ll need more time for woodwork with raised panels, routed profiles and other detailing. And if any of the woodwork is damaged, warped or just badly worn (or even coming apart at the seams and joints), you’re probably better off buying new unfinished doors and drawers that you can still use with your cabinets and paint yourself.
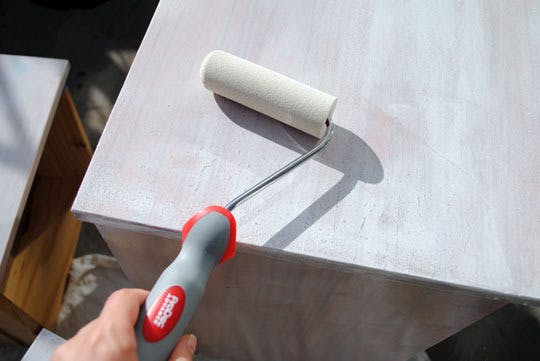
You’ll want to make your choice of applicator – will you be spraying, rolling or brushing? Pick the one that is best suited to the woodwork to be repainted, your own skill and the type of paint you want to use.
The first step is to remove the cabinet doors from the cabinets as well as any and all hardware (pulls, knobs, latches) from the doors. Put them in a bag to keep them together and easy to find when you need to reassemble. Mark each door to correspond with its original location in order to prevent any mix up. If you are only painting the fronts of the drawers, it won’t be necessary to remove the attached metal slides inside.
Next, you need to thoroughly clean the cabinet surfaces. In the kitchen you’ve got grease, steam, etc…make sure your surfaces are free of any related residue before sanding and painting. Make a solution of one part trisodium phosphate and four parts water to rinse – not soak – the cabinets. Let them sit for a day.

After they’ve dried completely, lightly sand the doors on all sides. Be careful not to round any wood edges (a wood sounding block will help). If you are essentially just attempting a general renovation, you won’t need to sand or paint the cabinet interiors. Instead, mask them off inside with painters tape to ensure a clean finish. Sand the front surfaces and edges of the face frame only.
You don’t necessarily need to remove all of the old paint if it is solidly adhered. Just sand the surface enough to allow the new paint to be applied without issue. Also, sand down any areas that are still shiny due to the previous gloss finish. If you come across a finish that can’t be sanded, you’ll need to rub it off with denatured alcohol and fine steel wool. Vacuum any dust from all surfaces, and if you have an air compressor, blow the dust out of the crevices and molding details. Remove any remaining residue by wiping up the area to be painted with a tack cloth.
Now, it’s time to apply the primer/sealer. This will ensure a well-bonded finish coat as well as minimize the need to sand or de-glaze old finishes before repainting. Primer-sealers also establish a compatible surface for semi-gloss water based paint that provides a durable finish and is easy to work with.
Finally, it’s the paint’s turn. Start with the inside edges and openings of the face frames. Then tackle the cabinet side before getting to the face front frames. This order facilitates speedy work on the less important spots and allows you to correct any visible drips or smudges that happen in the more exposed areas.
Next, do the cabinet doors, drawer fronts and any other wooden pieces or moldings. Be certain to let the paint flow evenly into any crevices and corners and do not let it collect in any one spot. Apply in thin light coats and cover all areas (thin coats dry quickly and leave fewer brush strokes). Don’t apply the finish too thick, and don’t overwork the brush – that could cause flaws such as air bubbles that remain as imperfections after drying.
Between coats, the paint needs to be left to dry for at least four hours. When dry, lightly re-sand in preparation for the next coat. Wipe away the dust with a tack cloth and repaint. Two coats are typically all you need, assuming you use decent quality paint. You can add a third if you want extra protection from the heat and typical kitchen abuse that the cabinets need to withstand.
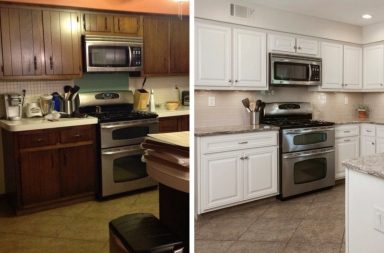
Lastly, reinstall the doors to your cabinets using the corresponding markings to ensure everything goes back correctly. You have successful completed a major DIY project. Look around and enjoy! The aesthetic of your kitchen should be noticeably improved.


