Installing Your Own Toilet In an Hour
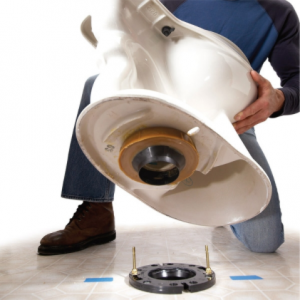
If you are following along with this 2-part series on replacing your own toilet, then you have already read all about removing your old one as well as be well equipped with all of the materials you will need for the installation ahead. Otherwise, you may want to take a trip over to part 1 in order to get a quick refresher on the list of materials to get this install done fast and efficiently.
If you already have your tools, along with your new toilet, tank in hand, you’re all set!
Installing the Toilet Step-by-Step
Your install procedure will in many ways appear as a structured reversal of the old toilet’s removal. Our steps still involve doing this process in phases to avoid tweaking your back lifting too much.
Disclaimer: Where applicable, you should always follow the manufacturer’s instructions as a priority over any instructions from an article you are reading right… this… second.
- Your first step is installing the closet bolts for the new bowl into the flange. If they screw into the floor, install them in place of the old bolts. If they are newer bolts with different attachment features, simply make sure that they are still installed in a line parallel to the wall behind the toilet.

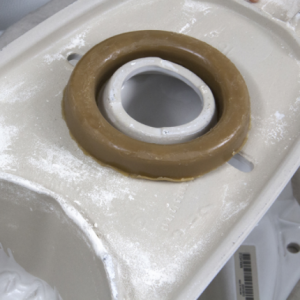
- Now you need to install the wax ring seal beneath your new toilet. It will be easier to work with if it’s warm, so allow it to heat up some before proceeding. Place the bowl upside down on a towel or rug to protect the top porcelain. Apply the wax ring to the base around what is referred to as the “waste horn”, applying the tapered edge to the bowl:
- Time to place the bowl over the flange on the floor. Remove your rug from the hole, turn the bowl right side up and position it down over the flange so that the closet bolts come through the bowl. You can now loosely install the washers and nuts over the closet bolts (following any prescribed manufacturer’s instructions).

- With the bowl properly positioned, rock it gently back and forth in order to create a good seal with the wax ring and install the bowl more firmly against the floor. You may notice that it isn’t possible to get the toilet completely flush with the floor, but don’t worry. That is what toilet shims are for!

- With the bowl placed, tighten the nuts on the closet bolts now, alternating between the two for an even distribution.
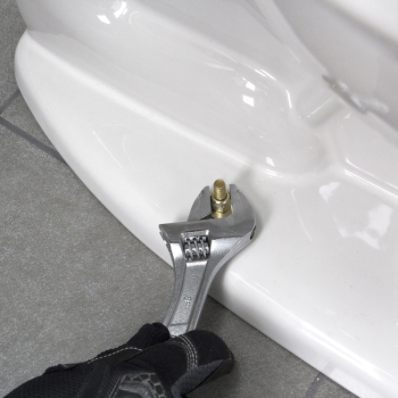
- Next, install your bolt caps onto the closet bolts. This can be done using any of their accompanying plastic clips, or a bit of sealing caulk to secure them.

- At this point, we want to ensure that the toilet bowl is flush. You may have discovered at this point that there exists some degree of unevenness in your floor. Here we can take advantage of some pocket change or toilet shims to slide beneath the toilet and eliminate any slight rocking that could lead to a nasty leak down the road.

- At this point you will want to seal the base of the toilet. Using the bathroom caulk or other appropriate sealant, apply from the tube and smooth it down with a wet finger along the base of the toilet bowl.

- You are ready to install your tank on the bowl. Follow your manufacturer’s instructions to install its rubber gasket onto the outlet at the bottom.

- From the bottom of the inside of the tank, install the tank mounting bolts and rubber washers that will connect the tank down to the bowl. Then position the tank on the bowl so that the mounting bolts connect through the bowl’s receiving bolt holes. Securely fasten the tank to the bowl, alternating between left and right sides.

- Install your water supply line. If you’re reusing your existing one, attach it to the tank. A new one will need to be installed at both ends (tank and supply valve).

- Install your
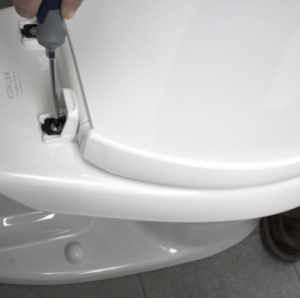 toilet seat on the bowl, following any specific manufacturer’s instructions.
You’re All Set With Your New Toilet!
If you followed along with our series of steps for removal and installation, you should be proudly regarding your new toilet in all its glory. Bear in mind that the flushing mechanism in the tank may need some minor adjustments, so give it a flush and see how it does. The manufacturer will have any instructions for calibrating the flush. Beyond that, we thank you for checking out our instruction set and wish for many happy returns. For your next project, perhaps consider converting your tub into a shower.
